In today's interconnected world, remote IoT monitoring with Raspberry Pi has become an essential tool for businesses and hobbyists alike. It allows users to monitor and control devices from anywhere in the world, providing real-time data and insights that are invaluable for decision-making. Whether you're managing a home automation system or overseeing an industrial IoT network, understanding how to implement remote IoT monitoring using Raspberry Pi is crucial.
With the increasing demand for smart solutions, leveraging Raspberry Pi for remote IoT monitoring offers a cost-effective and versatile approach. This tiny yet powerful device can handle complex tasks, making it ideal for IoT projects of all scales. From environmental monitoring to agricultural applications, the possibilities are endless.
This article will delve into the intricacies of remote IoT monitoring with Raspberry Pi, offering step-by-step guidance, expert tips, and best practices. By the end of this guide, you'll have a comprehensive understanding of how to set up, configure, and maintain a robust remote IoT monitoring system using Raspberry Pi.
Read also:Understanding Alan Dershowitzs Hourly Rate A Deep Dive Into His Legal Expertise
Table of Contents
- Introduction to Remote IoT Monitoring with Raspberry Pi
- Raspberry Pi: An Overview
- Setting Up Your Raspberry Pi for IoT
- Understanding IoT Basics
- What is Remote IoT Monitoring?
- Tools and Software Required
- Step-by-Step Guide to Remote IoT Monitoring
- Security Considerations for IoT Systems
- Troubleshooting Tips for Raspberry Pi IoT
- Future Trends in Remote IoT Monitoring
Introduction to Remote IoT Monitoring with Raspberry Pi
Remote IoT monitoring is revolutionizing the way we interact with technology. At its core, it involves collecting, analyzing, and acting on data from connected devices in real time. Raspberry Pi plays a pivotal role in this process, acting as the brain of the IoT network. Its affordability, flexibility, and community support make it an excellent choice for both beginners and professionals.
One of the key advantages of using Raspberry Pi for remote IoT monitoring is its ability to integrate seamlessly with a wide range of sensors and actuators. This flexibility allows users to create customized solutions tailored to their specific needs, whether it's monitoring temperature, humidity, or even air quality.
Furthermore, the growing ecosystem of software libraries and tools available for Raspberry Pi simplifies the development process, enabling faster deployment and easier maintenance. As more industries adopt IoT technologies, the demand for skilled professionals in this field continues to rise.
Raspberry Pi: An Overview
Raspberry Pi is a single-board computer developed by the Raspberry Pi Foundation. Originally designed to promote computer science education, it has since evolved into a versatile platform for a wide range of applications, including IoT. The latest models come equipped with powerful processors, multiple USB ports, and built-in wireless connectivity, making them ideal for remote IoT monitoring.
Key Features of Raspberry Pi
- Compact and lightweight design
- Multiple GPIO pins for interfacing with sensors and actuators
- Support for various operating systems, including Raspbian, Ubuntu, and more
- Extensive community support and resources
These features, combined with its affordability, make Raspberry Pi a popular choice for IoT projects. Whether you're a hobbyist looking to automate your home or a professional building industrial-grade solutions, Raspberry Pi offers the tools you need to succeed.
Setting Up Your Raspberry Pi for IoT
Before diving into remote IoT monitoring, it's essential to properly set up your Raspberry Pi. This involves installing the operating system, configuring network settings, and securing your device. Below is a step-by-step guide to help you get started:
Read also:Unbeatable 25 Off Vioc Your Ultimate Guide To Savings And Benefits
Step 1: Install the Operating System
Begin by downloading the latest version of Raspberry Pi OS from the official website. Use a tool like Balena Etcher to flash the image onto an SD card. Once the installation is complete, insert the SD card into your Raspberry Pi and power it on.
Step 2: Configure Network Settings
To enable remote access, configure your Raspberry Pi to connect to your Wi-Fi network. This can be done through the graphical user interface or by editing the wpa_supplicant.conf file. Ensure that your device has a static IP address for consistent connectivity.
Step 3: Secure Your Device
Security is paramount when it comes to IoT devices. Change the default password, disable unnecessary services, and enable a firewall to protect your Raspberry Pi from unauthorized access.
Understanding IoT Basics
The Internet of Things (IoT) refers to the network of physical devices embedded with sensors, software, and connectivity, allowing them to exchange data and perform tasks autonomously. At the heart of every IoT system lies three fundamental components: sensors, actuators, and a central processing unit. In the context of remote IoT monitoring with Raspberry Pi, these components work together to provide real-time insights and control.
Key Components of an IoT System
- Sensors: Collect data from the environment, such as temperature, humidity, and motion.
- Actuators: Perform actions based on the data received, such as turning on a fan or opening a valve.
- Central Processing Unit: Analyzes the data and makes decisions, often using machine learning algorithms for advanced functionality.
Understanding these components is essential for designing an effective IoT system. By leveraging Raspberry Pi as the central processing unit, users can create sophisticated solutions that meet their specific requirements.
What is Remote IoT Monitoring?
Remote IoT monitoring involves collecting data from connected devices and analyzing it in real time, regardless of the user's physical location. This capability is made possible through cloud-based platforms and APIs that allow for seamless data transmission and storage. Raspberry Pi serves as the bridge between the physical devices and the cloud, ensuring that data flows smoothly and securely.
One of the primary benefits of remote IoT monitoring is the ability to detect and respond to anomalies quickly. For example, in an industrial setting, a sudden spike in temperature could indicate a potential equipment failure. With remote monitoring, operators can be alerted instantly, allowing them to take corrective action before a major issue arises.
Additionally, remote IoT monitoring enables predictive maintenance, reducing downtime and increasing operational efficiency. By analyzing historical data, users can identify patterns and trends that may indicate future problems, allowing for proactive rather than reactive maintenance.
Tools and Software Required
To implement remote IoT monitoring with Raspberry Pi, you'll need a combination of hardware and software tools. Below is a list of essential items:
Hardware Requirements
- Raspberry Pi (Model 3B+ or newer)
- MicroSD card (16GB or larger)
- Power supply
- Sensors and actuators (e.g., temperature sensor, relay module)
- Wi-Fi router or Ethernet cable
Software Requirements
- Raspberry Pi OS
- Python programming language
- MQTT protocol for data communication
- Cloud platform (e.g., AWS IoT, Azure IoT Hub)
Having the right tools is crucial for a successful IoT project. Ensure that all components are compatible and properly configured to avoid potential issues down the line.
Step-by-Step Guide to Remote IoT Monitoring
Now that you have a basic understanding of the tools and concepts involved, let's walk through the process of setting up remote IoT monitoring with Raspberry Pi:
Step 1: Set Up Your Raspberry Pi
Follow the setup process outlined earlier to ensure your Raspberry Pi is properly configured and connected to the network.
Step 2: Install Necessary Software
Install Python and any required libraries for your project. For example, if you're using MQTT, install the Paho MQTT library using pip:
pip install paho-mqtt
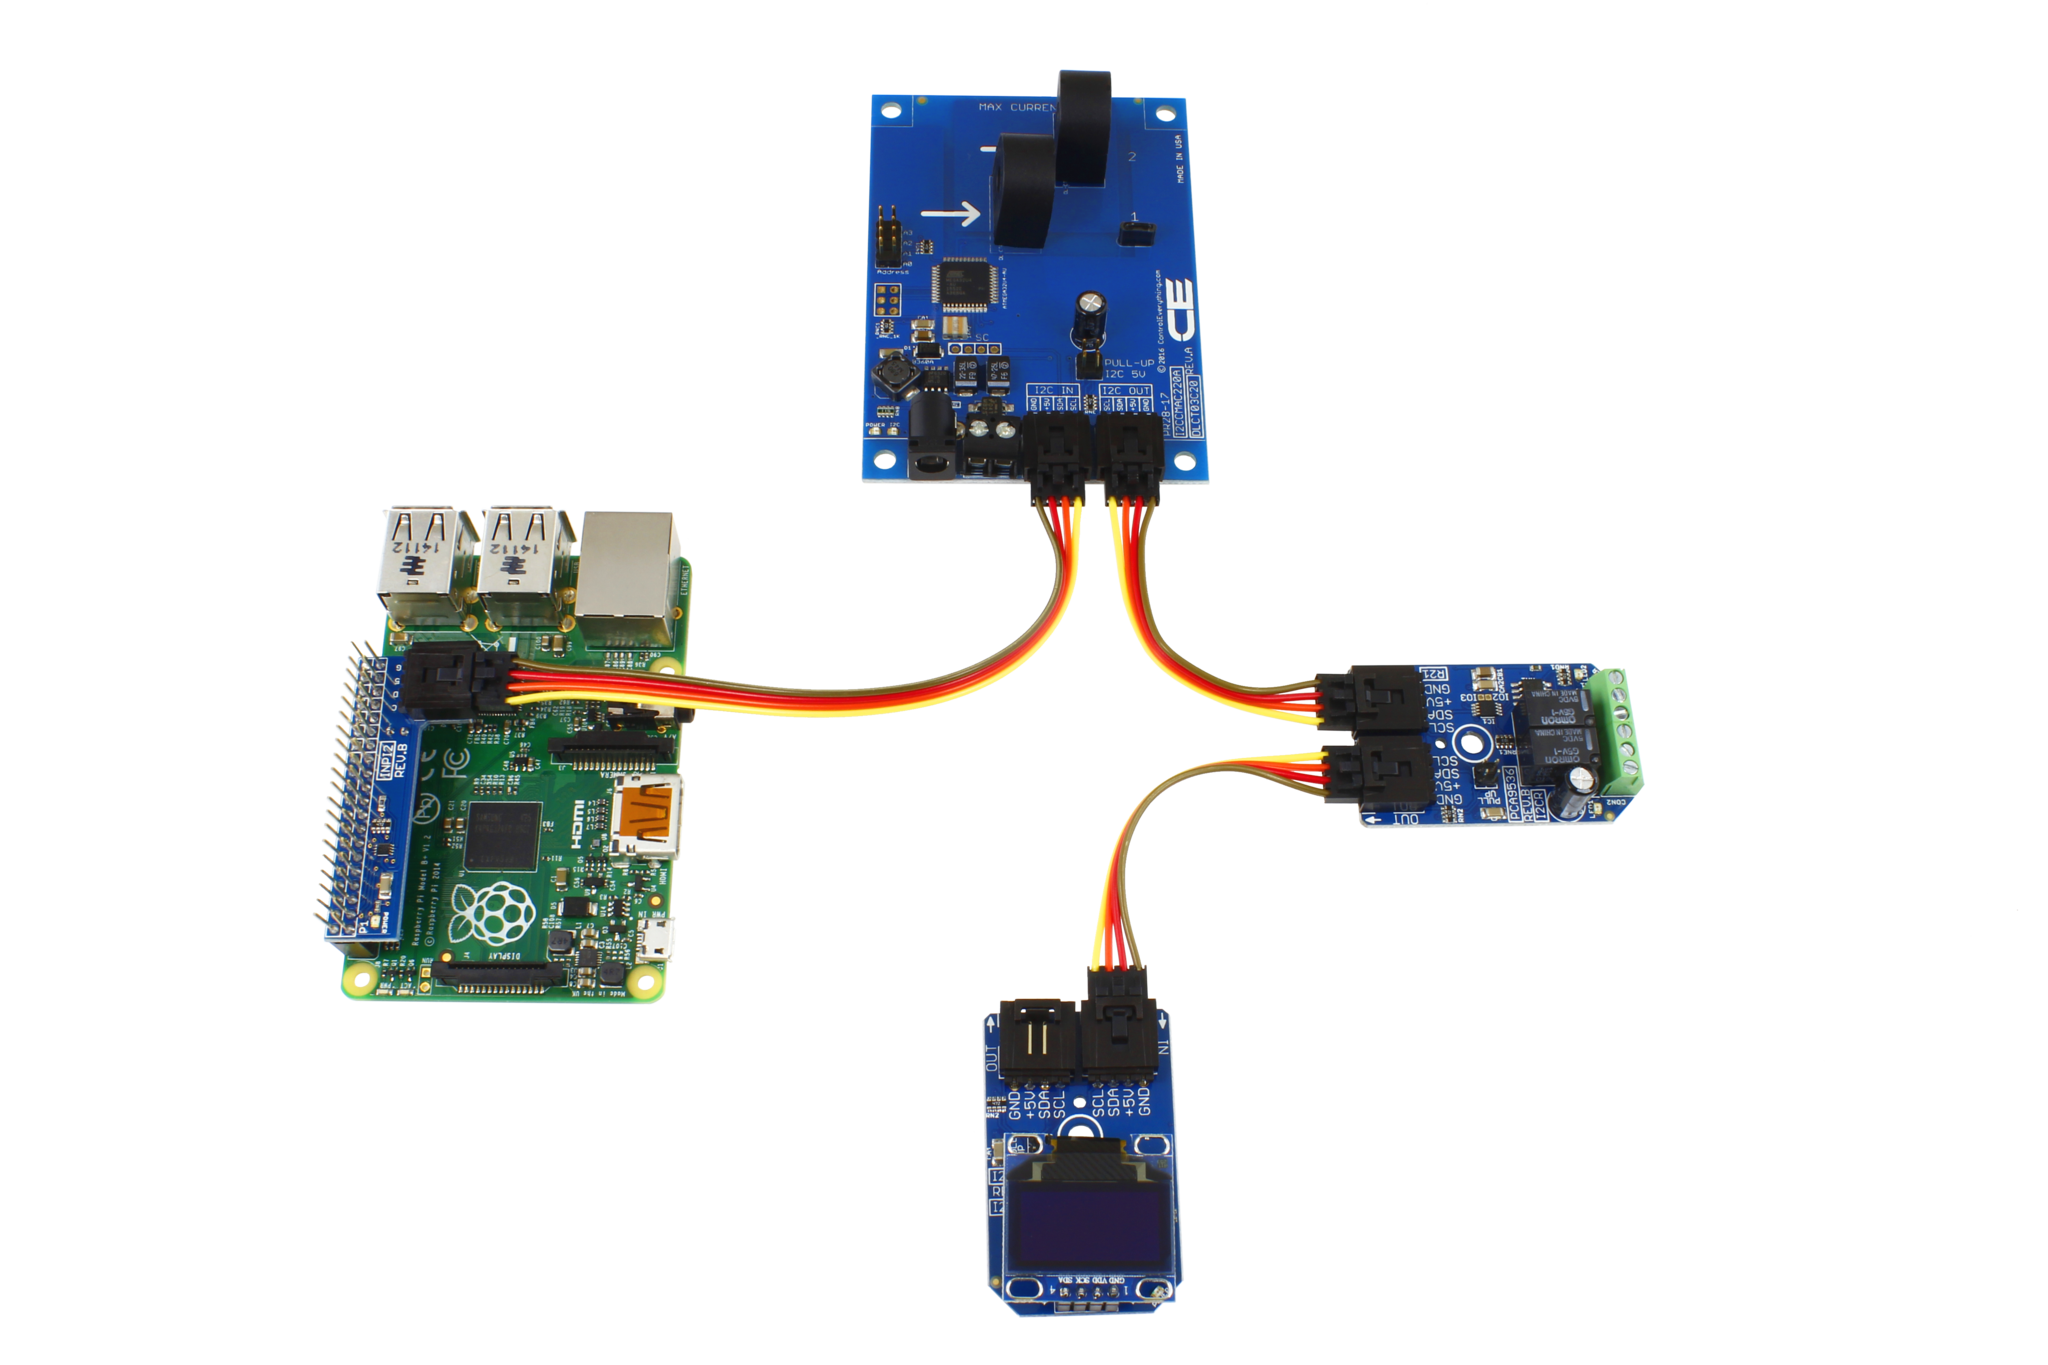
Step 3: Connect Sensors and Actuators
Wire your sensors and actuators to the GPIO pins on your Raspberry Pi. Refer to the datasheets for each component to ensure proper connections.
Step 4: Write the Code
Create a Python script to read data from the sensors, process it, and send it to the cloud. Below is a simple example using MQTT:
import paho.mqtt.client as mqtt def on_connect(client, userdata, flags, rc): print("Connected with result code "+str(rc)) client = mqtt.Client() client.on_connect = on_connect client.connect("broker.hivemq.com", 1883, 60) client.loop_start() while True: temperature = read_temperature_sensor() client.publish("remoteiot/temperature", temperature)
Step 5: Test and Deploy
Test your system thoroughly to ensure all components are functioning as expected. Once satisfied, deploy your solution and begin monitoring your data in real time.
Security Considerations for IoT Systems
Security should be a top priority when implementing remote IoT monitoring with Raspberry Pi. Below are some best practices to help protect your system:
1. Use Strong Passwords
Change the default password for your Raspberry Pi and use a strong, unique password for all accounts.
2. Enable Firewall
Install and configure a firewall to restrict incoming and outgoing traffic to only what is necessary.
3. Keep Software Updated
Regularly update your operating system and installed software to patch known vulnerabilities.
4. Use Encryption
Encrypt all data transmissions using protocols like HTTPS or TLS to prevent unauthorized access.
By following these security measures, you can help ensure the integrity and confidentiality of your IoT system.
Troubleshooting Tips for Raspberry Pi IoT
Even with careful planning, issues may arise during the implementation of your remote IoT monitoring system. Below are some common problems and their solutions:
Problem: Raspberry Pi Won't Connect to Wi-Fi
Solution: Double-check your Wi-Fi settings and ensure that the SSID and password are correct. If the issue persists, try resetting the network configuration.
Problem: Sensors Not Reading Correctly
Solution: Verify the wiring and ensure that the sensors are properly connected to the GPIO pins. Check the datasheets for any specific configuration requirements.
Problem: Data Not Reaching the Cloud
Solution: Test the MQTT connection and ensure that the broker is reachable. Check the firewall settings to confirm that the necessary ports are open.
By addressing these issues promptly, you can minimize downtime and maintain the reliability of your IoT system.
Future Trends in Remote IoT Monitoring
The field of remote IoT monitoring is rapidly evolving, with new technologies and innovations emerging regularly. Below are some trends to watch for in the coming years:
1. Edge Computing
As data volumes continue to grow, edge computing will become increasingly important. By processing data locally on the Raspberry Pi, users can reduce latency and improve response times.
2. Artificial Intelligence
AI-powered analytics will play a significant role in IoT systems, enabling more advanced insights and predictions. Machine learning algorithms can help identify patterns and anomalies that may not be immediately apparent.
3. 5G Connectivity
The rollout of 5G networks will enhance the capabilities of remote IoT monitoring, providing faster and more reliable connections. This will enable new applications and use cases that were previously impractical.
Staying informed about these trends will help you stay ahead of the curve and continue to innovate in the field of remote IoT monitoring with Raspberry Pi.
Conclusion
In conclusion, remote IoT monitoring with Raspberry Pi offers a powerful and flexible solution for a wide range of applications. By following the steps outlined in this guide, you can create a robust and secure system that provides valuable insights and enhances operational efficiency. Remember to prioritize security and stay up-to-date with the latest trends to ensure the long-term success of your IoT projects.
We encourage you to share your experiences and ask questions in the comments below. Additionally, explore our other articles for more in-depth information on IoT and related technologies. Together, let's build